注記
最後に移動して、完全なサンプルコードをダウンロードします。または、Binderを介してブラウザでこの例を実行します。
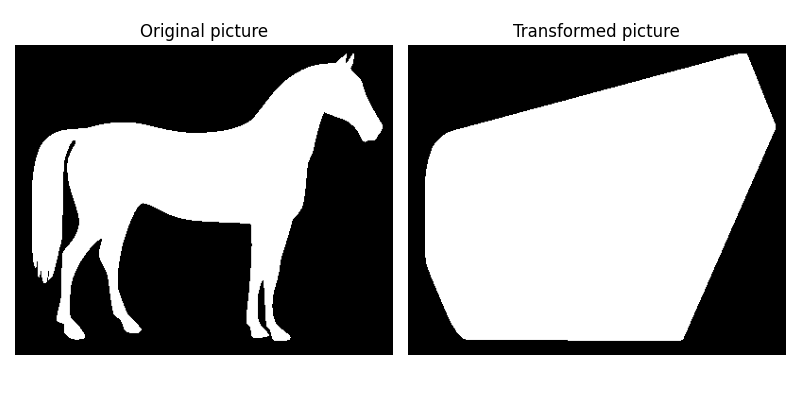
凸包#
2値画像の凸包とは、入力内のすべての白色ピクセルを囲む最小の凸多角形に含まれるピクセルの集合です。
アルゴリズムの概要は、Steve Eddinのブログに掲載されています。
import matplotlib.pyplot as plt

from skimage.morphology import convex_hull_image
from skimage import data, img_as_float
from skimage.util import invert

# The original image is inverted as the object must be white.
image = invert(data.horse())

chull = convex_hull_image(image)

fig, axes = plt.subplots(1, 2, figsize=(8, 4))
ax = axes.ravel()

ax[0].set_title('Original picture')
ax[0].imshow(image, cmap=plt.cm.gray)
ax[0].set_axis_off()

ax[1].set_title('Transformed picture')
ax[1].imshow(chull, cmap=plt.cm.gray)
ax[1].set_axis_off()

plt.tight_layout()
plt.show()
違いを示すために、2番目のプロットを用意します。
chull_diff = img_as_float(chull.copy())
chull_diff[image] = 2

fig, ax = plt.subplots()
ax.imshow(chull_diff, cmap=plt.cm.gray)
ax.set_title('Difference')
plt.show()

スクリプトの総実行時間:(0分0.429秒)